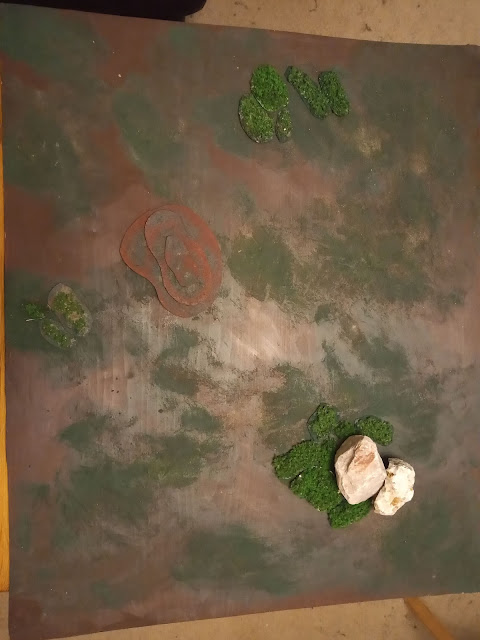
Today I would like to delve into another of the many battles that made up the 1335 2nd war of the massive faux pas. The introduction and 1st battle can be found Here and Here respectively.
After the disastrous pummeling his forces received at Rippletons Mound the lord of Bolted Crevice determined to bring the Lords of Dawkinsholme to battle once more. He did this through the means of fighting a series of spoiling raids along the borders of the two territories combined with an endless barrage of rude letters designed to insult and goad his enemies into marching. These letters are among the newly found material recently discovered by prof D.D. Flattitude that shed new light on the conflict. Among the nuggets of (non)information not really found are the following:
'The Lord of Steppindale is without doubt the most odious little insect in Lummoxshire, even lord Ingale of Bottomly gate gets more birds than him and he's dead!!'. Sent on the 3rd of June.
'Lord Carsinday smells like the rear end of a Burkinshire cow, which must be why his wife married him, heard mentality!.' 16th June.
'Lord Specly is the son of a diseased pig with stupid clothes and the common sense of Duke Lagathorde of Kibblesworth....but none of the looks. 21st June.
'Lord Balforth is a twat' 14th, 22nd, 24th, 27th and 29th of June. Also sent on the 2nd, 9th, 12th and 17th of July.
It seems his campaign of 'terror' bore fruit as on the Lords of Dawkinsholme combined with a large contingent of Spantalian mercenaries (hired and personally lead at great expense by Lord Balforth) set forth to put the upstart Lord in his place. For his part the Lord lead his forces to meet them at Stremleys pile.
The field of battle
As with Rippletons Mound I have used my 2mm medieval forces to recreate the battle. My 2mm forces use a colour coded system to identity them:
The army colours are Blue for Bolted Crevice and White for Dawkinsholme.
The unit colours are:
Knights: Gold
Men at arms: Silver
Leve: Red
Archers: Green
Cavalry: Yellow.
As with the previous game I will be using One Hour Wargames by Neil Thomas (heavily modified by myself). In this game I have gone BIG so decided to split the forces into three 'battles' just like real medieval armies. These activated alternately driven by an initiative roll each turn. I promise I will post my modified rules soon.
The forces arrayed for battle, Bolted Crevice at the top and Dawkinsholme at the bottom.
The forces of Bolted Crevice deployed as follows
Lord Crabbidge lead the left battle consisting of 3units of Archers and 3 of Leve.To the rear Lord Phalappe command the reserve battle of 2 Knights and 2 Cavalry ordered to only commit to the battle once the main lines clash.
In response Dawkinsholme deployed thusly:
Lord Cravages battle held the right made up of 3units of knights and 2 units of Cavalry.On the left the main battle lead by Lord Balforth and his Men at Arms supported by 5 units of local and mercenary Leve.
The view along the Dawkinsholme Battle line just because.And the opposition line for the sake of it.
The battle got underway with Braffad's archers marching up the hill.Cravage ordered the Dawkinsholme horse forward to smash the enemy flank.
Right into a storm of arrows unleashed by the Bolted Crevice bowmen!.
First blood to the men of the Crevice!. (Dice display damage, skulls show units that require a morale test).
Rightfully pi**ed off at being constantly being called a tw*t Balforth orders the charge!.The situation as it nears elevensies.
From here the battle descend into a grind as units became bogged down in combat. Depending on your view point this is either pretty historically accurate as the battle became a game of who can break who first or just really boring. I personally loved it as units beat on each other until ones nerve gives way creating gaps in the line ready to be followed up, victorious units smashing into the flanks of already hard pressed enemy formations. You get a real sense of heaving battle lines pressing on each other. However that being said it wasn't without its tactically decisive moments:
As Cravage makes headway against Crabbidge Phallape orders the reserve Crevice horse into the enemy flank.Seeing the issue Lord Phallape orders his cavalry to dislodge them!. Que one suicidal head long charge into the enemy position!.
The grind between the infantry continues.Having seen off Cravages' horse Phallape orders his knights into the enemy infantry!.
The position as afternoon tea looms.With Brafford and Cravage having fled the field Lord Balforth realizes the battle is lost and with great annoyance leads the remaining forces of Dawkinsholme in retreat.


One for the Crevice! (Probably not allowed to say that).
ReplyDeleteThe 2mm blocks are looking good Mr Sprinks - I think the colour coding is a good idea for these little chaps.
Did they actually stop for tea?
Yes, they stopped for victory
DeleteDarjeeling and battenburg with proper China cups and doilies and everything!. The retreating Dawkinsholme soldiers paused for a quick fondent fancy if rumours are to be believed.
I like the colour coding, I just hope it doesn't take away from the effect of the spectacle on the table.